Storing and serving images in PostgreSQL with PHP
Published 2006, last updated 2008
Introduction
There are many "How to store an image in Mysql" tutorials but hardly any good tutorials for postgres. So i decided to write one. Storing images in postgres using php is easy and has several advantages but there some disadvantages also. We wont go into that debate here.
I've created a zip which contains all the files you need to understand this tutorial. Download it here.
PostgreSQL provides two distinct ways to store binary data.
- bytea
- binary large object ( BLOB) - Object is a large collection of uninterpreted binary data.
There are pros and cons for each of them. We are going to use the binary Large Object Method. Blob method stores the binary data in a seperate table and refers to that table by storing a value of type OID in your table.
Assumptions
Im assumming that you have postgres, php and apache server up and running, if not then check out this tutorial to setup apache, php and postgres.
My database name is test with the username in linux as 'postgres' and password as 'postgres'. The user in Apache is also named 'postgres'. You will have to modify the php code accordingly if you have a different database name, username and password. If all of this sounds alien to you then please read my How to install, configure Apache, Php, Postgresql on Linux tutorial.
What are we going to do
In this tutorial we are going to do the following things.
- Browse and select the image file.
- Upload the selected file.
- Store the image file in the database.
- View the file in a browser.
Creating an image table
We need to create a table in postgres to store our images in. Here is a simple table.
create table image (
     name varchar(20) not null,
     image OID not null,
     day date
);
Let's break it down.
First we have a name field where you can store the name of the image.
Next we have the image field whose datatype is OID which contains the actual image data.
Finally we have the day field which displays the date on which the image was uploaded.
The last field is not necessary but i think you will find it useful. You can add your own fields like category, description etc but for this tutorial we will keep it simple.
The Upload form
File Name - upload.php
<html>
<head><title>File Upload To Database</title></head>

<body>
    <h3>Please Choose a File and click Submit</h3>

  <form enctype="multipart/form-data" action="image.php" method="POST">

  <input type="hidden" name="MAX_FILE_SIZE" value="300000" />
  Name : <input type="text" name="name" size="25" length="25" value="">

  <input type="hidden" name="MAX_FILE_SIZE" value="300000" />
  File: <input name="userfile" type="file" size="25"/>

  <input type="submit" value="Upload" />

  </form>
</body>
</html>
enctype="multipart/form-data" ensures that the browser uploads the binary data of the an image file correctly.
The hidden field MAX_FILE_SIZE does not allow images that are too large to be uploaded. The value 300000 says that any image file whose size is greater than 300kb will not be uploaded. You can play around with that value as per your requirements.

The above html form will take a name and the filepath as an input from the user and give it to the php script in the image.php file. Note - Name and filename can be different.
Uploading the image
File Name - image.php
<?php

$uploaddir = '/home/postgres/';
$uploadfile = $uploaddir . basename($_FILES['userfile']['name']);
$name = $_POST['name'];

if (move_uploaded_file($_FILES['userfile']['tmp_name'], $uploadfile))
{
    //   echo "File is valid, and was successfully uploaded.\n";
}
else
{
   echo "File size greater than 300kb!\n\n";
}

echo "'$name'\n";

$conn = pg_pconnect("dbname=test user=postgres password=postgres");

$query = "insert into image values ('$name', lo_import('$uploadfile'), 'now')";

$result = pg_query($query);

if($result)
{
    echo "File is valid, and was successfully uploaded.\n";
    unlink($uploadfile);
}
else
{
    echo "Filename already exists. Use another filename. Enter all the values.";
    unlink($uploadfile);
}

pg_close($conn);

?>
The image file has to be uploaded to a temporary directory on the server where the user ( postgres in this case ) has read write access. Php then stores the image in postgres from the temporary directory . The $uploaddir variable stores the path of that temporary directory. The $uploadfile variable contains the path as well the filename. The 'move_uploaded_file' function moves the user selected file to the temporary directory. If the file is valid you won't get any errors.
Php then connects to the postgres database and uploads the file with lo_import. lo_import reads the specified file and places the contents into a large object.
Note - If your dbname, user and password are different, change the 'pg_connect' function by adding your own entries.
The display form
File Name - display.php
<html>
<head><title>File Upload To Database</title></head>

<body>
    <h3>Enter the filename and click Submit</h3>

  <form action="display_image.php" method="post">
    <input type="text" name="name" size="25" length="25" value="">
    <input type="submit" name="submit" class="button" value="Submit">
    <input type="reset" name="reset" class="button" value="Clear It">
  </form>
</body>
</html>
Enter the name of the file which you want to view and which you have already stored in the database. We have to type an image name because we dont want to do something silly like 'select * from image'

The above form takes the name from the user and gives it to an another script which retrives the selected the image from the postgres database. Make sure the name you enter is present in the database as we have not added any error checking code.
Displaying the image
File Name - display_image.php
<?php

$conn = pg_pconnect("dbname=test user=postgres password=postgres");

$name = $_POST['name'];
$temp = '/home/postgres/tmp.jpg';

$query = "select lo_export(image, '$temp') from image where name = '$name'";
$result = pg_query($query);

if($result)
{
    while ($line = pg_fetch_array($result))
    {
        $ctobj = $line["image"];
        echo "<IMG SRC=show.php>";
        printf ("<br/>".$line["name"]." - ".$line["day"]." ");
    }
}
else
{
    echo "File does not exists.";
}

pg_close($conn);

?>
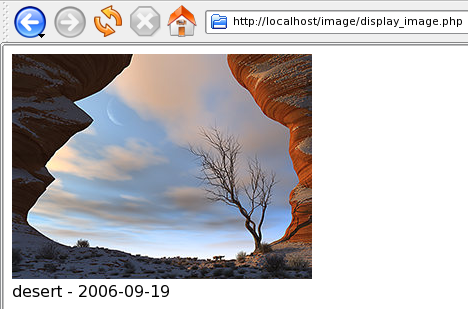
$_POST['name'] contains the name which you entered. $temp contains the path of a temporary file where the retrieved image is stored. 'lo_export' is a postgres function which gets the file which you want from the image table and saves it in the temporary file.
But its not over yet. We have to display the file in the browser. For that we need another script which reads the file from the temporary location and displays it in the browser. Why do we need another script to display the image? Its because a request for an image is a separate HTTP request. An image is its own web page. Hence we need a script to output 'JUST' the image.
The image script
File Name - show.php
<?php

header("Content-type: image/jpeg");
$jpeg = fopen("/home/postgres/tmp.jpg","r");
$image = fread($jpeg,filesize("/home/postgres/tmp.jpg"));
echo $image;

?>
The header tells the browser what kind of file it tries to download. The fopen function opens the selected file and places a file pointer at the beginning of the file in the $jpeg variable. The fread function reads up to length bytes from the file pointer where length represents the size of the file.
Final output